Showing posts with label Unity. Show all posts

Monday, 9 January 2023

FrancoJam Gamejam Winners 2022!

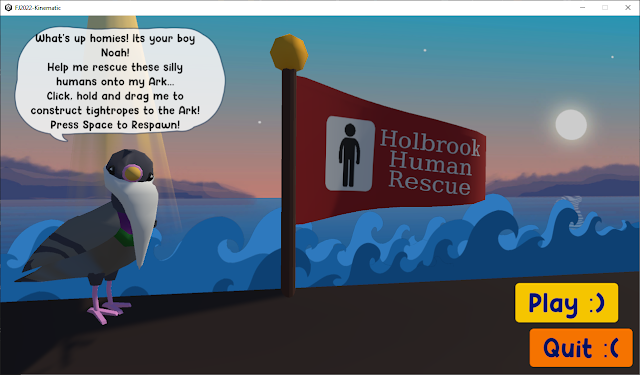
Towards the end of last year I took part in Creative Assembly's GameJam, and it just got announced that our team won! Hooray!

This year's theme was 'Animal Rescue' inspired by Creative Assembly's charity of the year, so we decided to put a spin on the theme and make a game about an animal (Noah the pigeon) rescuing humans onto his ark. We had a total of 48 hours to make the game.

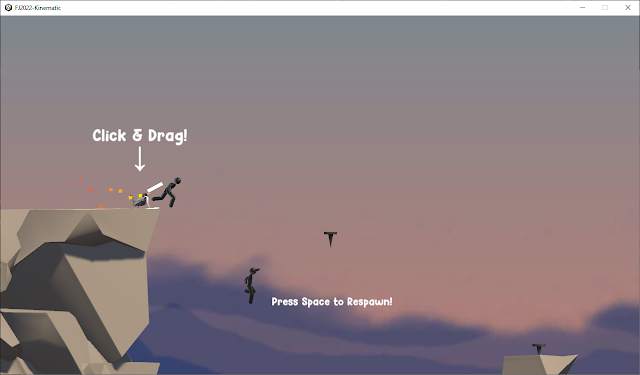
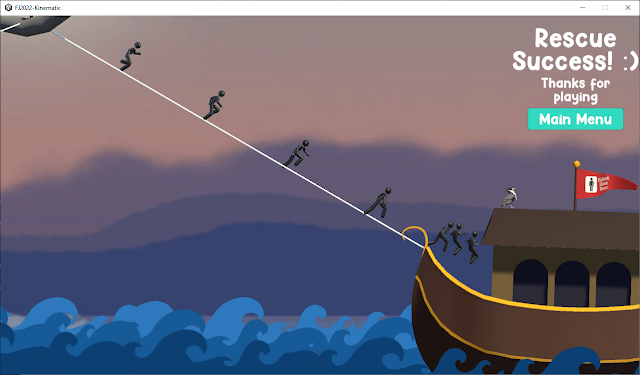
The idea for the gameplay is to launch Noah the pigeon via a catapult click & drag mechanic to connect a tightrope to pins scattered throughout the level, thus creating a path for the humans to walk across and board the Ark.


We created the game in Unity, and used other DCC's such as Maya and Photoshop to help create the assets. I'm really pleased with the way this game turned out, and even more proud of our team that took home the trophy! Good job Team Kinematic!

Credits:

Alex Tavener(me) - Art (pigeon, ark, background)

Ross Harrop - Art (humans, environment)

Chris Kemp - Programming

Chris Kozlowski - Audio

William Fynn - Moral support & ideas consultant


GG!


Friday, 25 May 2018

List of Insanely Useful Sine Graph Equations

Hooolla hola hola hola! This is insanely useful!

Do you want to animate something with code, but you don't want it to be your everyday dull sine?
Look no further, I have found an -incredible- image!

(CLICK TO ENLARGE)

Look at all these glorious equations beautifully laid out before your eyes!

Now you can have a bouncy-ball (pointy) sine, which could be useful for procedurally animating waves,
OR...
A linear zig-zag sine, which could be useful for animating a robot or mechanics,
OR...
A slightly rounded sine, which could be useful for animating something gently hovering

and much much more!

The possibilities are limitless! Now GO! Go use these fantastic formulas and animate me all that is siney and wavey!

Wednesday, 1 March 2017

Unity hates 0 scale

Ello!
It's been a while, but that's because I've left games to do some VFX work at Double Negative in London!

However, back to Unity problems...

The Problem:
Animation/Geometry not appearing upon import .fbx in Unity. Specifically geometries that had been animated in their scale.

The Fix:
Do not animate to complete 0. Animate to 0.001.

Don't ask me why, Unity is a mysterious woman, yadda yadda yadda.

Wednesday, 12 October 2016

Triangulation, Deformation & Max influence issues - Maya to Unity

I'm working on a game trailer at the moment, and encountered a bug regarding deformation issues and things not appearing in Unity as they do in Maya. Thanks Unity.

The Problem:

A side by side comparison between Maya and Unity shows that in the middle of an animation being played, we are getting different deformations.
Maya
Unity
It may be hard to see because of the lighting, so I have drawn a blue outline of the jacket beside each image. As you can see, the image on the left (Maya) has a nice smooth deformation. The image on the right has a 'nice' lumpy deformation.
The reason this happens I believe, is due to the way Unity interprets the influences of joints, and also the triangulation on export/import.

The Fix:

1.) First, go into your quality settings in Unity (Edit>Project Settings>Quality) and try changing your blend weights. If it's on 2 bones, change it to 4, and vice versa. This should hopefully fix your problem.


2.) Still not fixed the issue? Have a look at your rig in Maya, what are your max influences on your mesh? Play around with these settings and try capping your max influences at 4 with the 'set max influences' option. You shouldn't be using any more than 4 for a game rig anyway (with the exception of cinematics/trailers etc.)


Happy riggydigdigging!

Tuesday, 17 May 2016

More Unity Animation Mismatches

Yet again, another mysterious animation mismatch.
You have your animation in Maya, it's all set up how you want it, you export it, open it up in Unity and boom - something's out of line, mis-placed or rotated in the wrong way.

The problem that caused the issue for me this time round, were rotational values dipping from negative to positive. In the gif below, you can see the mismatch:


As you can see, the hand is rotated as intended in Maya, and yet when exported and brought into Unity, something is happening along the way.

The fix was to go into the graph editor and edit the rotate X value, so that it no longer crept up into the positive values. Interestingly, using the Curves>Euler fix button actually caused the issue for me this time round. Here, you can see the graph editor before and after:


Still not entirely sure what causes this, but it looks as though Mecanim has something to do with it, as when set to 'generic' mode, the issue no longer persists within Unity.

 Unity is a mysterious woman.

Tuesday, 12 April 2016

Unity GUI errors

Recently i've been getting a lot of GUI errors. This is one of the errors that flags up in my console:

Reported delta does not match with progression of time. Check that the OnInteractivePreviewGUI function only updates the Animator on Repaint events.


If you're unsure why you're getting an error (not specifically this one) try resetting your layout. As mad as this sounds, it's fixed a multitude of errors for me now.. buggy old Unity.

Mecanim update bone bug!

Frustration!

If you want to go back and edit your rig after you have already exported it into Unity, and created an avatar - you're going to have a fun time.

Unity doesn't seem to take to updating files very well - especially avatar files. This is the problem I faced and how I fixed it:


1.) Export Rig into Unity - everything hunky dory, avatar bones configured. Great.
2.) Export animations - link to avatar. Everything working okay.
3.) Update rig in Maya (in my case, the positioning of the bones were changed)
4.) Re-export to Unity, overwriting the old avatar file.
5.) Look at animations, things are looking wroooong. Intersection issues everywhere. WHAT IS GOING ON.

And the solution:
6.) Make an entirely new avatar file, re-link animations to new avatar file. Eureka! Things work.

I can only assume that when you create and configure a new avatar, Unity will set this in stone, even if the file is overwritten. Creating an entirely new avatar forces Unity to re-do this configuration process, thus updating any bone/rig changes.

Thursday, 3 March 2016

The mysterious 'update' button.

After coming across numerous problems with Mecanim and setting up avatars, I came across an unusual 'fix'. Whilst this seemed to fix things from the onset, it caused major problems further down the pipeline and is something you should avoid.


Here, you can see the default settings of a .fbx animation file upon first loading it into Unity. Excellent, now we want to change the Animation type to 'humanoid' and avatar definition to 'copy from another model' (something which has already been set up previously).


Now, for whatever reason the order in which you click these buttons seemingly yields a different result. You'll notice that if you change the animation type to humanoid then click apply, then change the avatar definition, and then click apply once more, a little button labelled 'update' will appear.


How interesting, I wonder what happens if we change all the settings in one go without going through this two stage process of clicking 'apply' twice.


No update button... What!? Whether this is a bug or a feature, I have no idea. However, from an initial glance, it seemed as though leaving this button un-clicked fixed a lot of problems (intersecting parts of the rig with the mesh, additional bones/joints affecting the avatar etc).

BUT!!!

In the long run, it seems to leave the avatar in a weird limbo between 'generic' and 'humanoid' setups. For one, no root motion will be generated when this update button is still visible, your looping indicators will not change depending on the frame range, amongst many other problems.

For anyone with any further knowledge, please let me know what this feature is for. For anyone else, to save yourself from future pain, just click the button.

Wednesday, 10 February 2016

Euler Rotation Problems

Recently I've been having an issue when animating that a control will flip 180° or 360°. This usually occurs for me when I am matching FK/IK manually or animating a character turning around.

You can see the issue occuring here:


Very annoying - especially if to fix it you go in frame-by-frame. Fear not, there is an extremely handy and seemingly magical button in the graph editor called 'Euler filter'. It is located under Curves>Euler filter. Select the problem keyframes, hit this button and voila! Like magic, Maya interprets the information, and prevents any curves from exceeding 360°. Perfect.


Why this isn't a MASSIVE button outlined in red I don't know...

Monday, 11 January 2016

Importing rigs from Maya to Unity

I have been working at the games studio: Mojo Bones for a little over 2 months now. This is my first job in games and I have had to overcome a range of problems when importing rigs from Maya into Unity.

Here are some of the key problems I faced and resolved which I shall discuss in this post:
  • Hierarchy - Why Unity hates broken hierarchy and how to deal with it.
  • Scaling - stretchy squashy joints. Why this won't work out of the box and how to overcome it.
  • Naming conventions (naming clashes can cause problems whatever program you are in!)
  • Avatars - what they are, and how to set them up.
  • Exporting to an FBX - what to include, and what settings to set.
  • Humanoid setup with Mecanim.
  • Extra/Additional bones when using Mecanim (like wings, clothes, or in my case a backpack.)
  • Jittery Animation? Probably keyframe compression.

Hierarchy
The Fix:
If you are using a broken-hierarchy rig, follow these steps:
  1. Select all joints you want to be bound (or are already bound) to the skin in the initial broken hierarchy rig. 
  2. Duplicate them.
  3. Remove any constraints and connections. 
  4. Parent any broken sections ( eg: ribbon joints ) 
  5. Parent constraint each of the newly duplicated joints to their respective broken hierarchy rig counterparts. 
  6. Give them a suffix. ( eg: 'game_' )

The Explanation:
Mecanim hates broken hierarchy. That is the nub of it. If any part of your rig uses broken hierarchy (such as ribbons) Unity will spit it right back out.

You can follow the fix above and do this manually each time for every character OR you could save yourself potential hours and script it... OR you could save yourself even more time and use my script,
which you can download for free below.

AT_gameRigJnts.zip

Extract the download into your Maya scripts directory, and then run these three lines of code:

import gameRigJnts
from gameRigJnts import *

gameRigJnts.gameRigUI()


Scaling joints - squash and stretch 
The Fix:
You will need 2 rigs for this to work as mentioned in the hierarchy section of this post. When all game rig joints have been constrained to the broken hierarchy rig, you can now see that the scaling in the axis that points down the joints (in most cases the 'x' axis) works. Whilst this now squashes and stretches it does not retain mass.

Unfortunately you will need to effectively 'scrap' the conventional 'y' and 'z' stretch nodes/expressions and fake it with blendshapes instead. Blendshapes are fairly heavy on game engines, some do not support their use and you will never get an exact mathematical squash and stretch - but it will do the job.

The Explanation:
Turns out Unity hates scaling joints too. After scripting my own stretchy/squashy spine in Python and implementing it into a rig for Unity, I soon discovered that the deformations were not transferring over as they looked in the viewport for Maya as they did in Unity's animation inspector (viewport).

Annoyingly, I couldn't seem to find the issue immediately, as nothing seemed to be out of the ordinary and no warnings were flashing up upon import. However... after doing a bit of searching around on the internet, I discovered that Unity does not evalate scaling in the same way that Maya does. Infact, Maya seems to have it's own scaling algorithm built into it when it comes to scaling joints.


Naming Conventions
The Fix:
Make sure no two items are named the same when importing to Unity. Batch add prefixes if necessary with the 'prefix' tool in Maya.

The Explanation:
Naming conventions are something which cause problems all the time all over the place. Not only do naming conventions help keep everything tidy, organised and legible for when you or somebody else opens your scene up in 18 months time, it also prevents further problems down the line.

Naming conventions are ESPECIALLY important in rigging (although I'm sure every department would say that about their own part of the pipeline).
When you have 200+ joints in your rig, you need to be able to find something fast and efficiently. Naming may also help with specific scripts that you'll want to run in the future.

In this particular case, when I imported my first ever rig into Unity, I came across a problem with my naming conventions; name clashes.

The reason that I had a name clash was because I have 2 separate skeletons, one serving as a normal, broken hierarchy rig that I would usually use for vfx or cg film and the other - since Unity hates broken hierarchy - is a non-broken hierarchy rig. This serves as a 'dummy' or 'slave' rig that just follows the initial rig through parent constraints.

These two separate hierarchies (effectively duplicates of one another) each had the same names for the same bones - a bad practice whatever program you're in, but for Unity it was particularly bad for dealing with the Mecanim system and may have caused other errors down the line. Best just to avoid it at the outset.

Fortunately, this is a very quick and simple fix - just add a prefix to one of the skeletons, (eg: game_head_jnt, game_pelvis_jnt, etc.) Once this is done you are good to import to Unity.